Introduction
To create a supplier in Oracle Apps, navigate to Suppliers > Create Supplier. Here, you’ll enter key supplier details such as name, tax ID, and payment terms. Once the supplier is defined, these details automatically populate across all related transactions, ensuring consistency and efficiency. Proper configuration is crucial to align with the specific nature of the supplier’s transactions, optimizing the entire procurement process.
Purchasing, Payables and Fixed Assets all use the Supplier Master. As a result, while defining a supplier in the system, extreme caution should be used. Specific payable users will have access to enter supplier master data and update it in the Oracle application.
Defining supplier headers and supplier sites is part of the supplier creation process. Supplier header data is shared across all ledgers in the Legal Entity, whereas supplier site data is unique to each operating unit. The supplier’s site refers to the location of business from which the provider conducts business. Various supplier sites are specified when a provider has multiple business locations.
To create invoices on a supplier site, we must enable the pay site flag, and to raise purchase orders on the supplier site, we must enable the purchasing site flag. We can buy from numerous sites and transfer payments to different sites for a single supplier.
The majority of the information in the supplier header comes from the financial and payable options established for the operating unit, and the majority of the data at the supplier site comes from the supplier header. When we establish transactions for a supplier site, the information that we enter at the supplier site by defaults, all default can be altered at various levels.
With alphabetic and numeric numbering sequencing, Payable allows both automatic and manual supplier number entering techniques, with some limitations on future conversion. Automatic supplier numbering is enabled for organization ‘SPL’.
Payable does not allow you to create a new supplier with the same name as a current one. When a user accidentally submits two names for a supplier, such as ‘Generic Traders Private Limited’ and ‘Generic Traders Pvt Ltd,’ the system treats them as two independent suppliers. In such a case, the payables supplier merge feature can be used to merge both into a single supplier record with an option to choose for the update of associated purchase orders and invoices.
How to Create Supplier in oracle apps
The following steps perform in order to create a Supplier in Oracle Apps :
Navigation: Oracle Payables->Suppliers-> Entry
1. The search page for suppliers appears.
2. The user should first check to see if the supplier has already been defined in our app.
3. Navigate through the menus until you reach the Search Page.
4. Enter the supplier’s name and click the Go button. If the supplier has previously been defined, the system will display it; otherwise, it will declare that no search for this search criterion has been discovered.
5. You can use this page or the supplier’s report to see if the supplier has already been defined in the system. Choose Go after entering the supplier’s name.
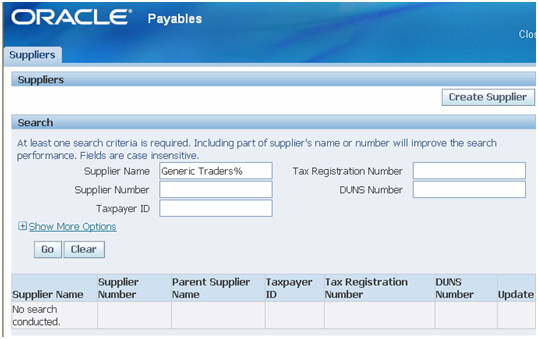
6. If the same supplier is not found, System will display as No Search Found in the Supplier Name field. Click on the ‘Create Supplier’ button to open Create supplier page.
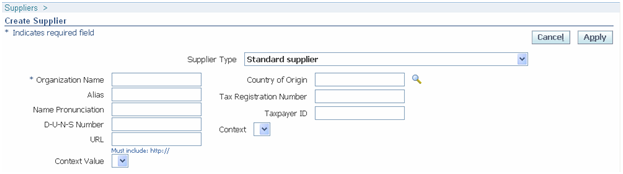
7. Organization Name: Enter the supplier’s name
8. Country of Origin: Select the country of Origin of the Supplier. Other fields are optional. Choose Apply
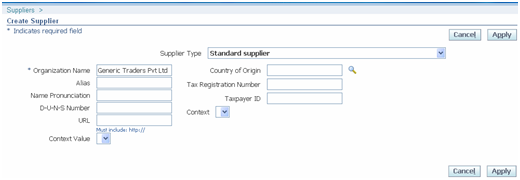
9. Payables assign a sequence number for the supplier and the Quick update page opens

10. Choose Organization under Company Profile to open the organization page
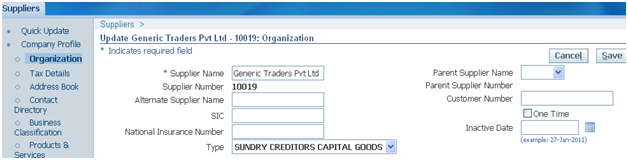
11. Type: Select Vendor Type. For example ‘Creditors Capital Goods’ and choose Save.
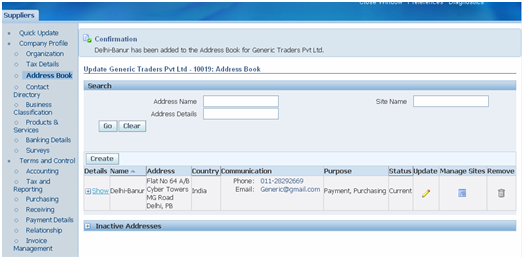
12. Choose Address Book under Company profile to open the address book page
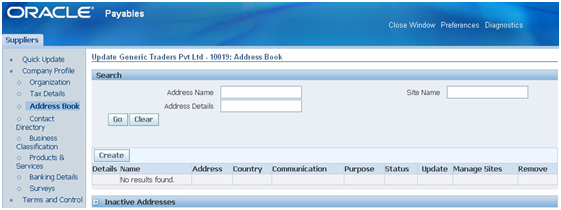
13. Click on the ‘Create’ button to enter the supplier address.
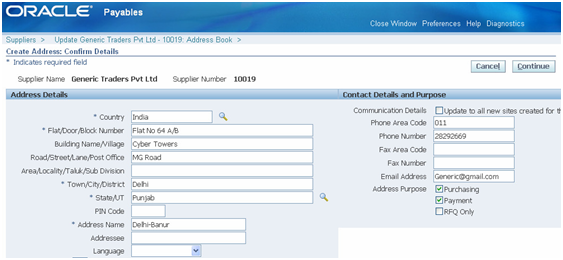
14. Address details: Select country and enter address information.
15. Contact details and purpose: Enter phone and fax details and enable the supplier address for Purchasing and Payment purposes.
16. Choose ‘Continue’. The site creation page with address details is displayed.
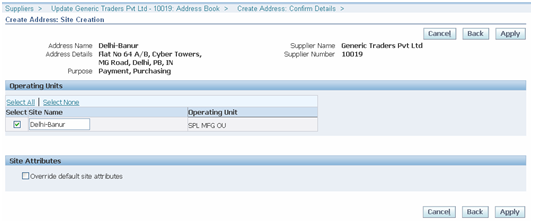
17. Operating Units: Select the site name and Choose ‘Apply’. Payable confirms the addition of address and site to the supplier under the operating unit.
18. Choose ‘Accounting’ under terms and control, to open the accounting page.

Click on the Search option which is marked in the above area and update the right location and right Liability (Supplier Payable) Account.
Note: Users must choose the correct Location Segment (Location with Product Division) when using Location Segment. When choosing a location value, more care is required.
To amend the Supplier advance account and Location Value, go to Prepayment. Update the Bills Payable/PDC account and Segment Value by clicking on Bills Payable.
Prepayment and Bills Payable accounts and segment values should be updated similarly to the Liability account.
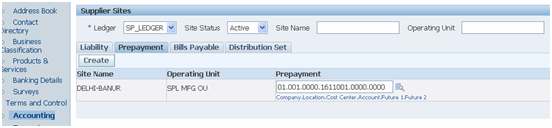
19. Check and update liability and prepayment accounts as relevant to the supplier being defined.
The liability and prepayment account default from the financial option. Choose Save.
20. In case the supplier is a material supplier, choose to purchase under terms and control.
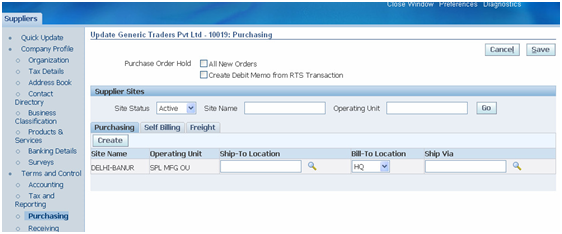
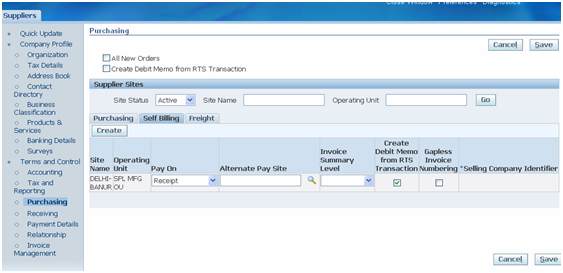
21. Select Bill-to-Location as ‘H.O’ (Head office) on the Purchasing tab page, select the Pay on option as ‘Receipt’ in the Self Billing tab page, and enable the flag for the ‘Create debit memo from RTS Transactions’ check box(Only required when the vendor is a material supplier).
22. Enabling the ‘All New Orders’ check option at the supplier header allows us to keep track of all new orders placed with that Supplier.
23. Under terms and control, select payment details to see the payment details page.
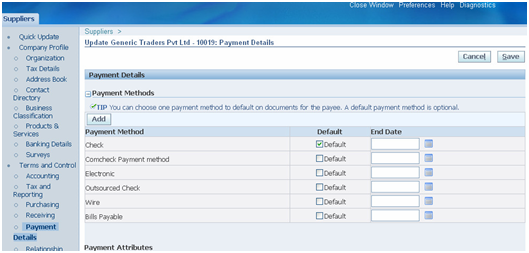

24. Choose ‘Update payment details’ under supplier sites on the Payment details page.
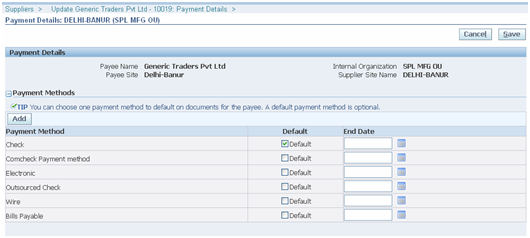
25. Enable the payment method and choose Save. Select check as the default payment method. Select bills payable payment method if the term of payment is against LC.
26. Choose Invoice Management under Terms and control to open the invoice management page.
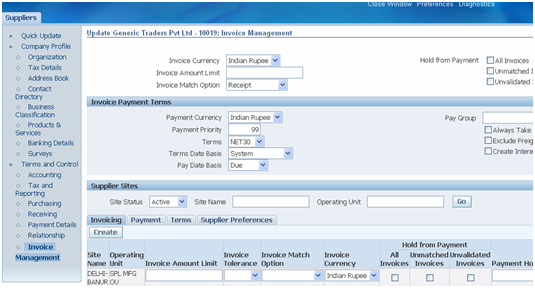
27. Update Invoice currency (Select a required currency from the list of values by choosing more…).
We can hold payment to the supplier for all invoices, unmatched invoices, and un-validated invoices by enabling the required check box. On Invoicing tab page for the supplier site. The options that we define at the supplier site default for the transaction, irrespective of values entered in the supplier header region.
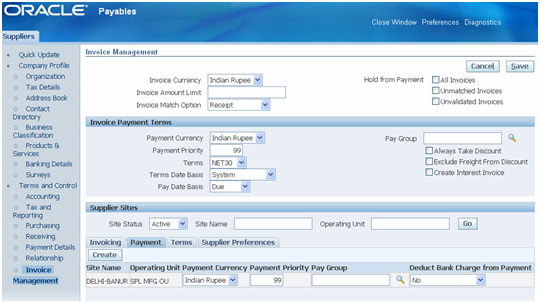
28. Update payment currency details for the supplier site on the Payments tab page. Select pay group to group supplier for releasing payment.
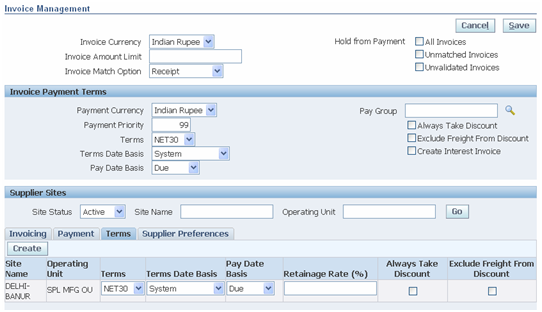
29. Select payment terms, terms date basis, and Pay date basis in the Terms tab of the Invoice Management window, then Save and Close.
Enter Supplier Additional Information
We can define tax registration information, assign item categories, assessable price lists, and TDS information using the additional information provided by suppliers.
For each provider with a null location and each supplier site, further information is defined separately. Supplier-related IT/TDS calculations are based on suppliers with no locations, not on supplier locations. Each operating unit has its own definition of supplier extra information.
Navigation: India Localization->Suppliers-> Additional Information.
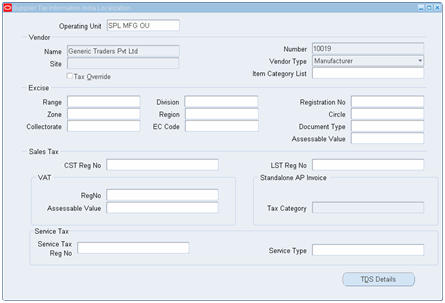
1. Select the Operating unit for which the supplier additional information is defined.
2. Select the vendor name and enter the required Tax Information and save the information.
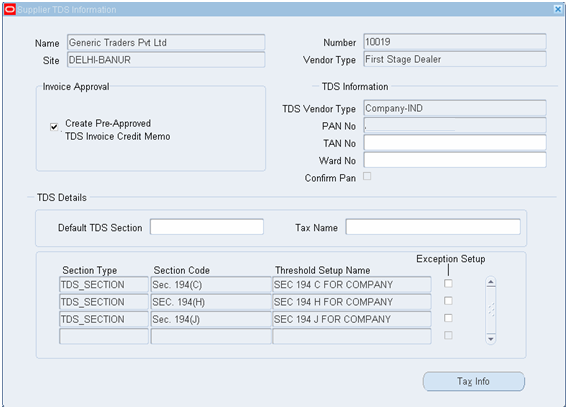
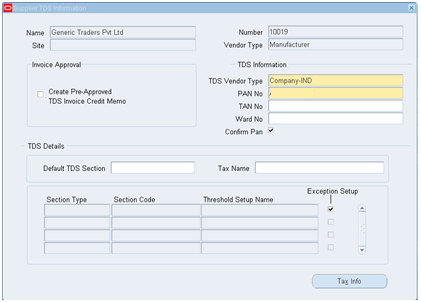
3. Click on TDS Details to enter the TDS Vendor Type, and PAN Number and enable Confirm Pan Number Option.
Click on Tax info and again click on TDS Details
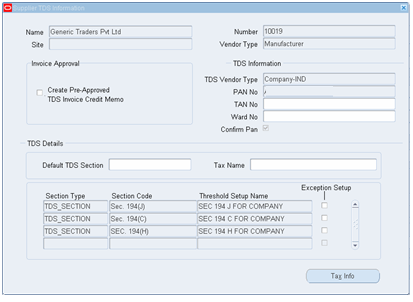
4. Close the windows and again navigate to the same window and Define supplier additional information for the same supplier with Site details. Click on TDS Details Enable the option “Create Pre-Approved TDS Invoice Credit Memo” and save the Information. Repeat this for all sites defined for the supplier.
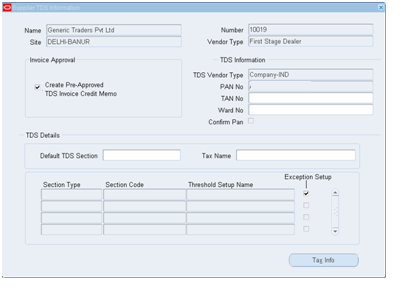
5. Choose the supplier’s vendor type. Manufacturer, first stage dealer, second stage dealer, and imported are the alternatives offered. If none of the values apply to the supplier, leave it blank.
6. Enter the excise range, division, registration number, zone, region, circle, commissionerate, and excise EC code information in the Excise block. This data is used in the printing of all Excise-related documents.
7. Define central sales tax registration and sales tax registration number in the Sales tax block.
8. Define the VAT registration number and the assessable value in the VAT block.
9. Define the service tax registration number and service type in the Service tax box.
10. Create a list of item categories and assessable prices (if applicable).
11. Select vendor type, PAN number, TAN number, and Ward in TDS information.
Confirm PAN.
12. Determine whether payables should create pre-approved TDS invoices and credit memos for TDS tax applied to transactions by selecting the appropriate option.