When we have multiple invoices to be selected for payment against a supplier (ex. Tax Authority supplier for TDS) or multiple suppliers, we can process payments through Payment Manager by submitting a single payment process request. Under this, the payment process automatically selects invoices based on specified criteria for ‘review’ by a user. The user can exercise the option to add or remove specific invoices selected by the process before it can ‘build’ payment. Once the payment is built by the system, the user can once again review and confirm before it can create and ‘Format’ proposed payments. After the payments are formatted by assigning payment documents, it is available for ‘Print’ of payment documents. Payments processed by the payment manager through a single payment request can be viewed in the window of the standard payment. It can be processed for accounting through the window of the standard payment. The validation process at each stage ensures that payments for a supplier are processed only when all invoices selected for payment could be processed.
We can also use single payment process requests to process payments for multiple suppliers at a time by defining pay groups. Pay groups are required to be assigned to supplier and supplier sites which in turn default to invoices. The payment manager assigns separate payment documents to each supplier for the invoices selected.
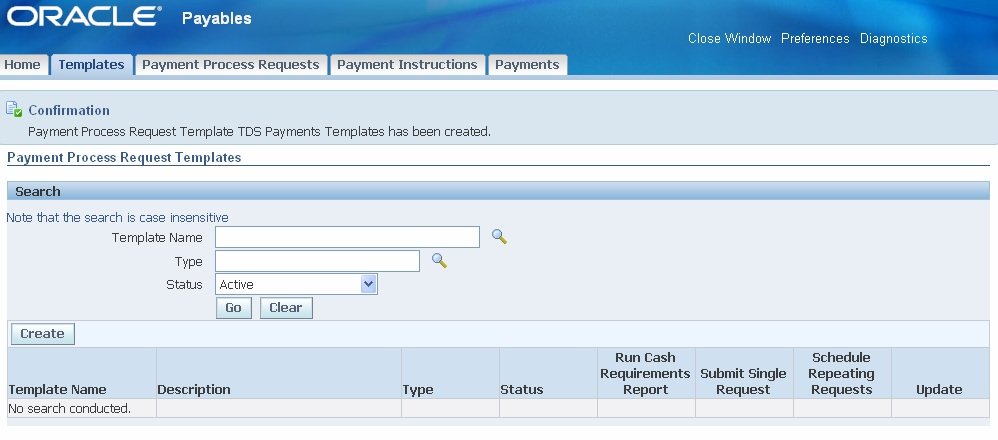
Creating Payment Process Request Template
Navigate : Oracle Payables→ Payments→ Entry→ Payments Manager
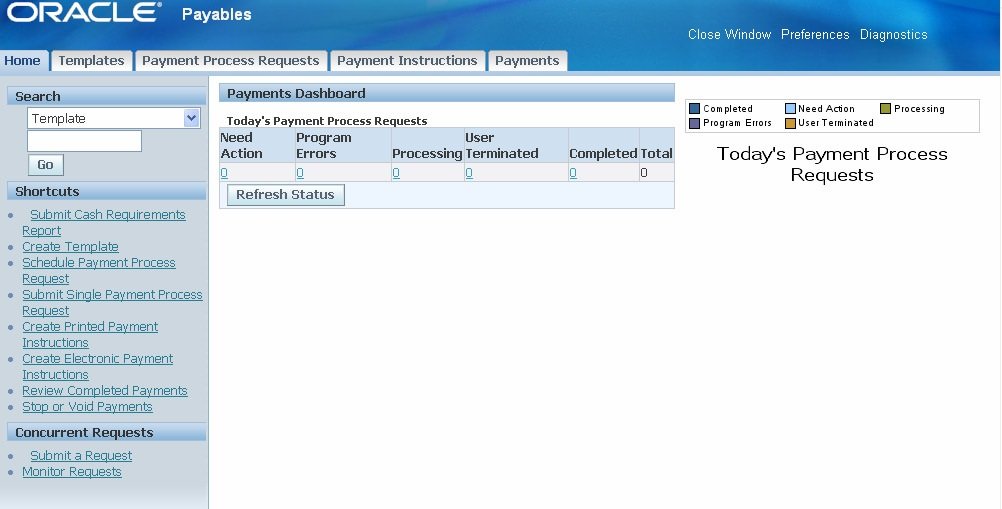
- Select create a template to open Create payment process request template
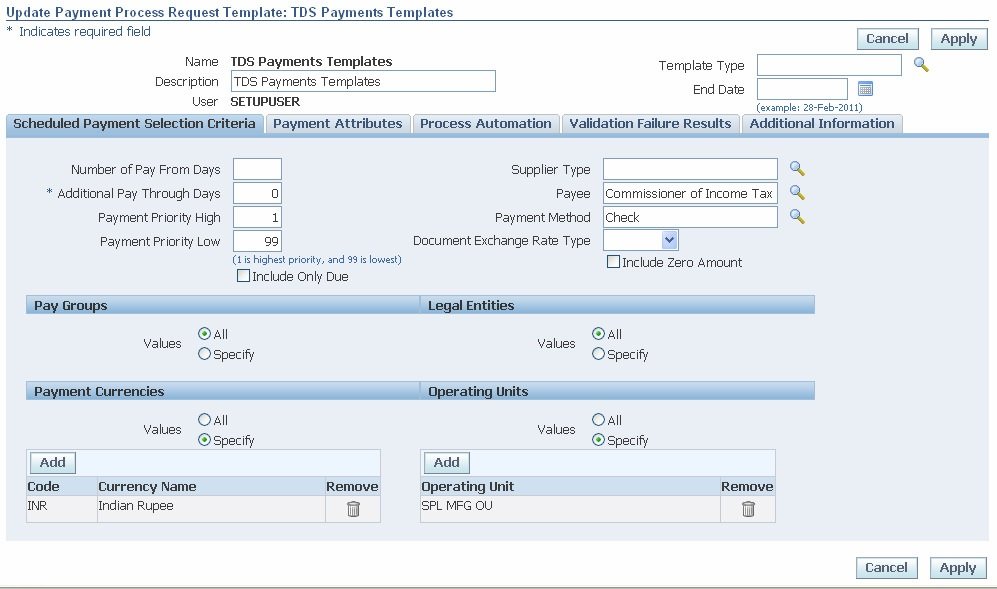
2. Enter unique and meaningful name and description for the template
3. In schedule payment selection criteria, select payee, payment method, additional pay through days, and payment priority high and low to be included in the payment batch.
4. In the pay group region, select specific and add pay group to be considered by the template for invoice selection.
5. In the payment attributes tab select payment date, payment exchange rate type
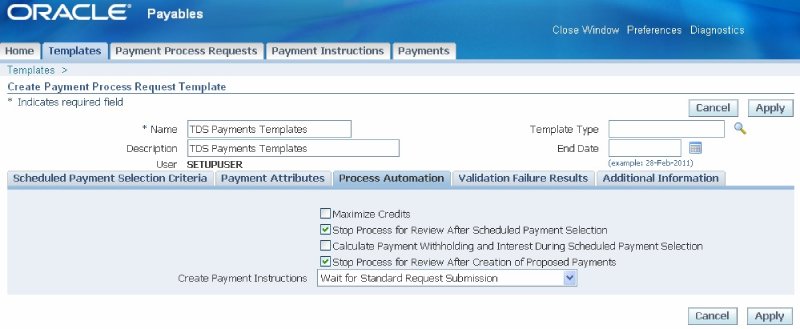
6. In the process automation tab, enable for stop process for review after scheduled payment selection, and stop the process for review after the creation of proposed payments
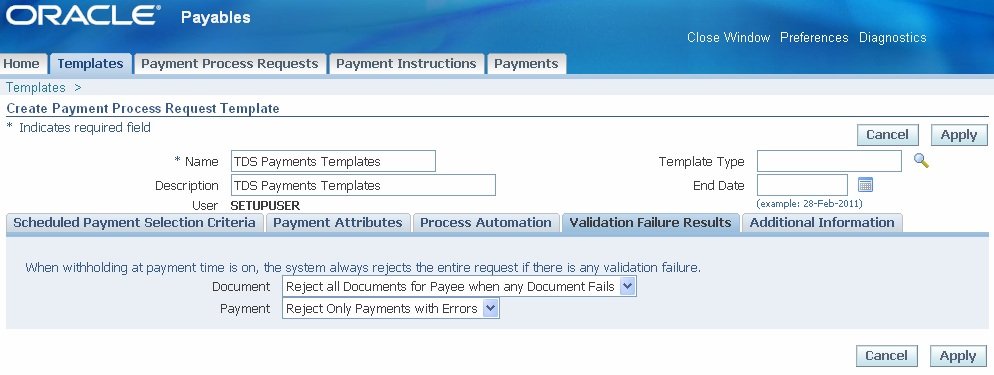
7. In Validation Failure Results, select the option to reject all documents for the payee when any document fails, and to reject only payments with errors
8. Choose to apply to save the template.
Processing Single Payment
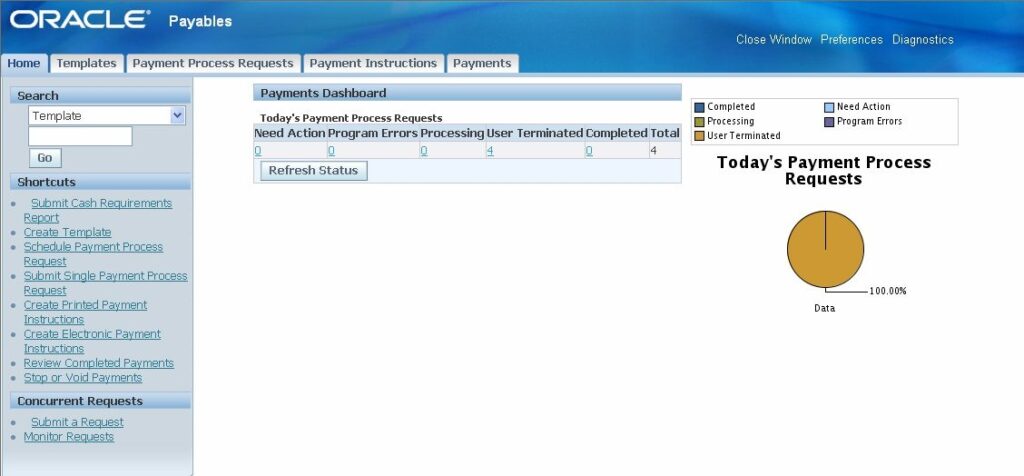
1. Select ‘Submit Single Payment Process Request’ on the Home page
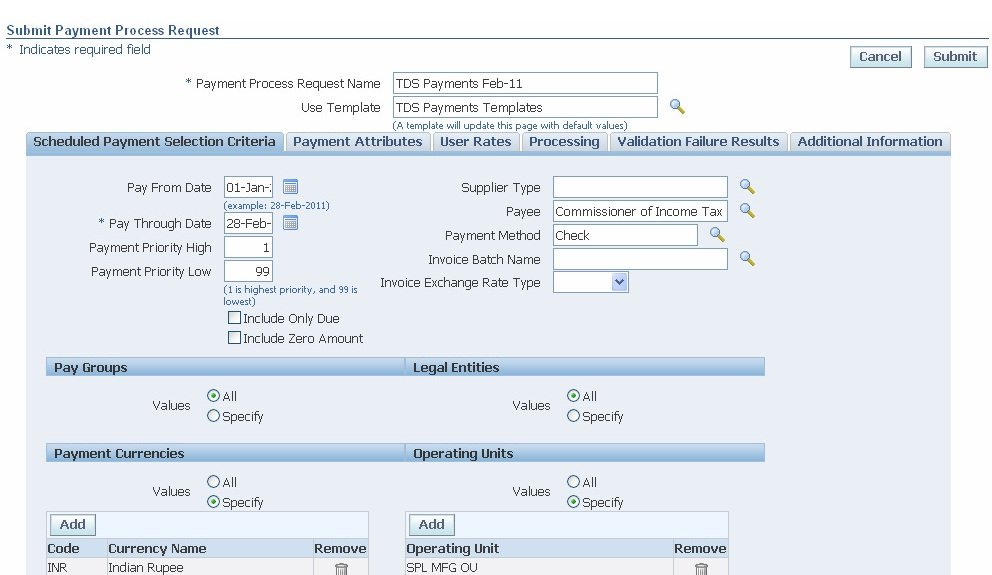
2. In submit payment process request page
a. Enter unique payment process request name
b. We can use the pre-defined template to default most of the values to be defined subsequently or enter values in each tab page as below.
c. In scheduled payment selection criteria
i. Enter pay from the date and pay through date ii. Select the supplier name in the Payee field
iii. Select the Payment method
iv. Choose to include only invoices that are due by enabling check box ‘include only due’
v. Select pay group to include single or multiple suppliers in the payment process vi. Specify payment currency and operating unit
3. In the payment attributes tab page
a. Enter the payment date for the payments being processed
b. Select Disbursement bank account, Payment document, Payment process profile, and Payment exchange rate type
4. In the Processing tab page
a. Enable ‘stop process for review after scheduled payment selection’
b. Enable ‘stop process for review after the creation of the proposed payment
c. Select options to ‘automatically initiate’ create payment instructions ‘when payment process request is complete’.
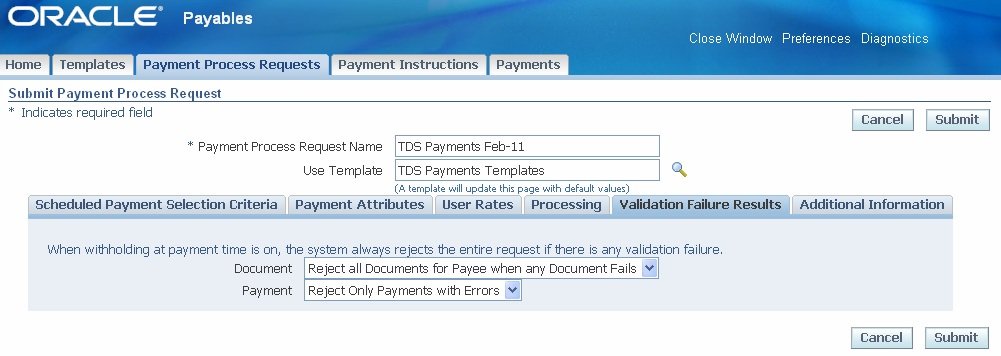
5. In the Validation failure results page, the system rejects the entire request if there is any validation failure
a. Enable for ‘reject all documents for a payee when any document fails’
b. In case of payments to multiple suppliers, ‘reject only payments with errors’
6. Choose to Submit and initiate the payment process.
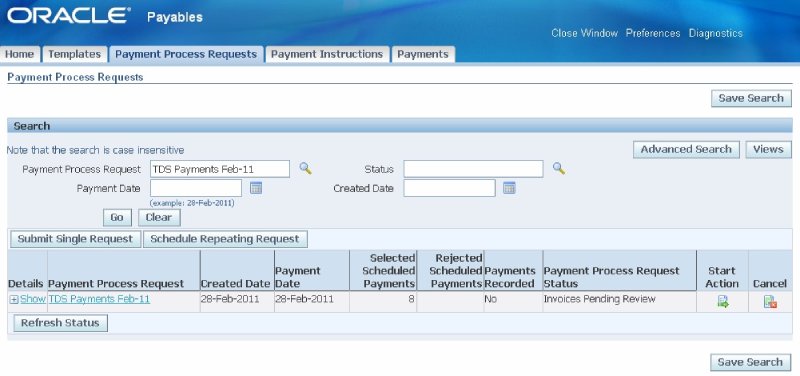
7. You can monitor the status of the payment process on the ‘Payment process request’ page by specifying the payment process request name.
8. On selection of invoices based on specified criteria, the status changes to ‘Invoice Pending Review’
9. Choose Start Action
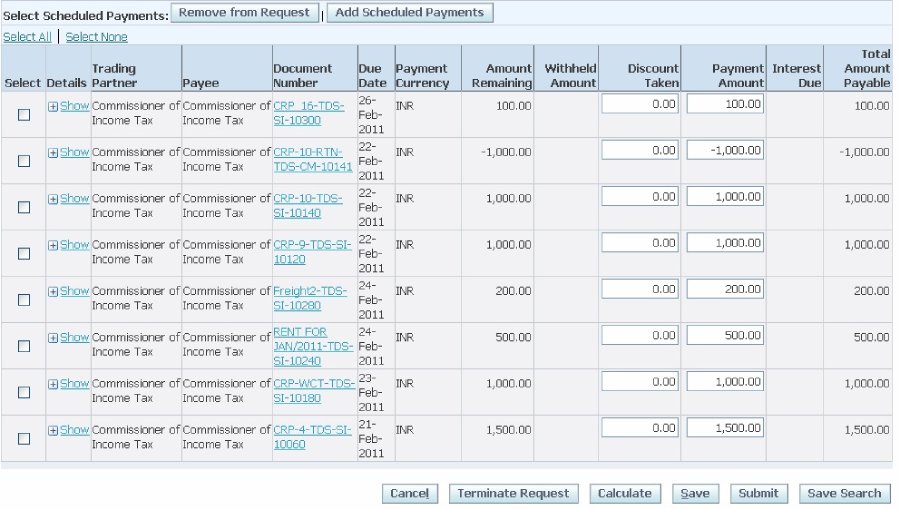
10. The selected schedule payments page opens and displays all invoices selected with details of supplier name, invoice number, due date, payment currency, the amount remaining, and payment amount. In case payment process request is submitted for processing payment of multiple suppliers the selected invoices can be searched by the supplier.
11. The user has the option to select a specific invoice and choose to ‘Remove from Request’ or add specific invoices (after removal) in scheduled payment by choosing ‘ Add Scheduled Payments
12. The payment amount for specific invoice can be modified in case we choose to release the only part payment for the invoice.
13. After reviewing the scheduled payments, choose ‘Submit’ to build payments
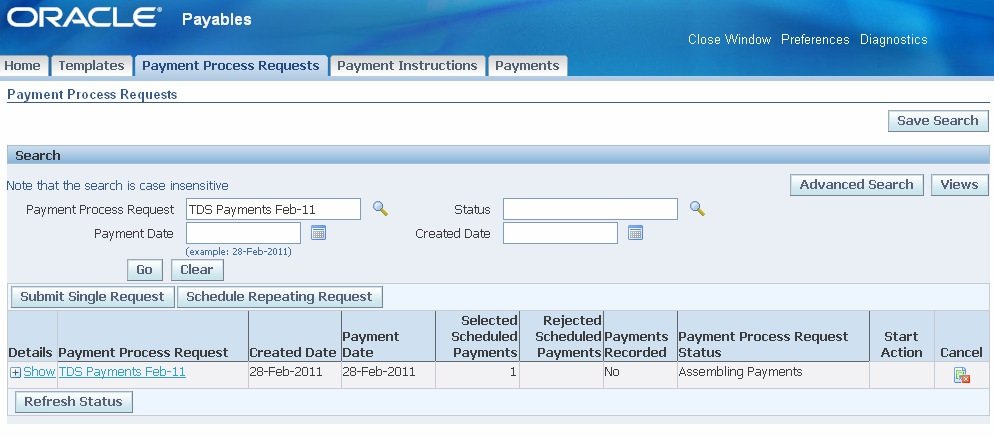
14. After the payments are built, the payment process request status changes to ‘ Pending Proposed Payment Review. Choose Start Action to proceed to review
15. The review proposed payments page displays the total payment amount it proposes to generate for payment against each supplier included in the process. On clicking on the amount, we can view the invoices included in the payment
16. Choose ‘ Run Payment process’ and select the Go button.
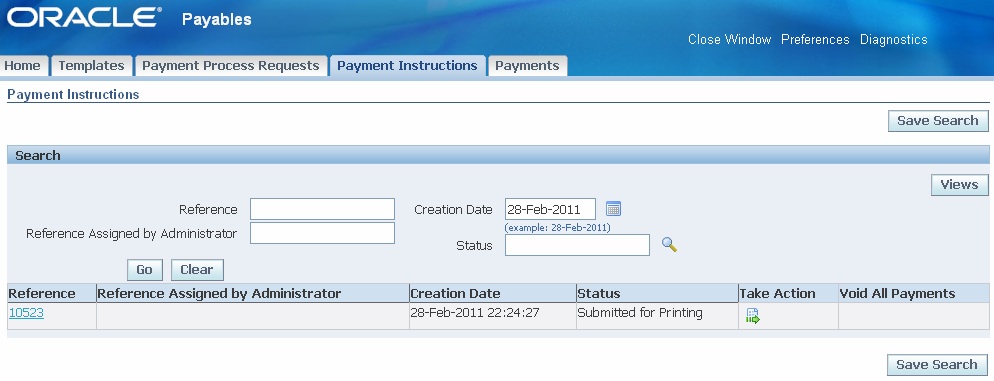
17. Navigate to the Payment instructions tab page and query by entering the payment process request name as a Reference assigned by the Administrator.
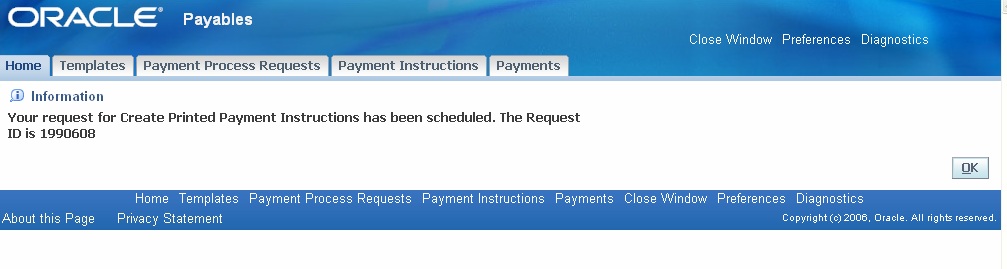
18. The status of the request is ‘Submitted for Printing’
19. Choose ‘Take action
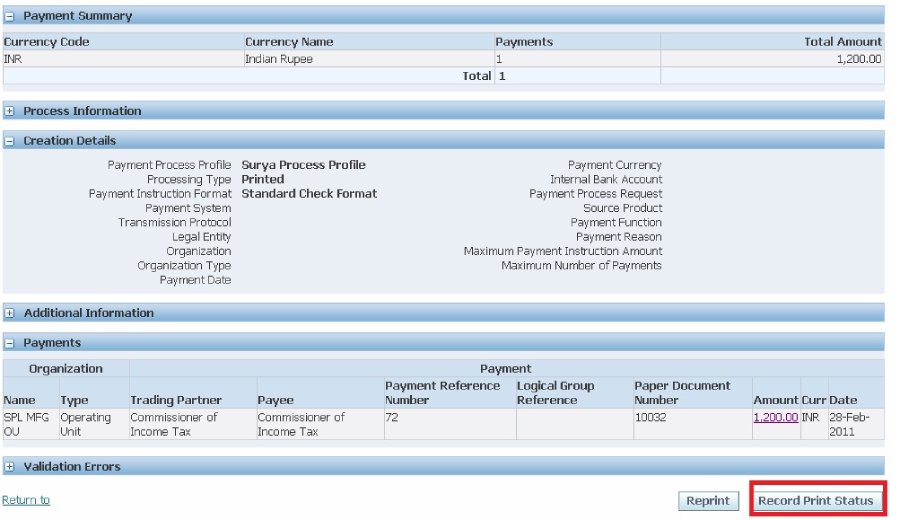
20. The process assigns payment documents for each supplier
21. Review and choose to ‘Record Print Status
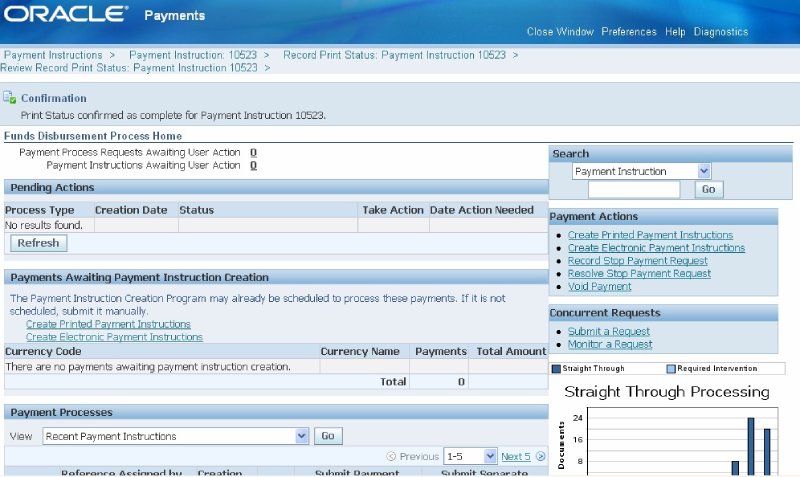
22. The status changes to Printed. Choose Continue
23. It provides a warning message to ensure that payment documents are properly printed since once payment is marked complete the payment will be recorded as issued. Subsequently, when we notice the problem in printing, we have only an option to void the payment and initiate a new payment process.
24. Choose ‘Apply’ after review.
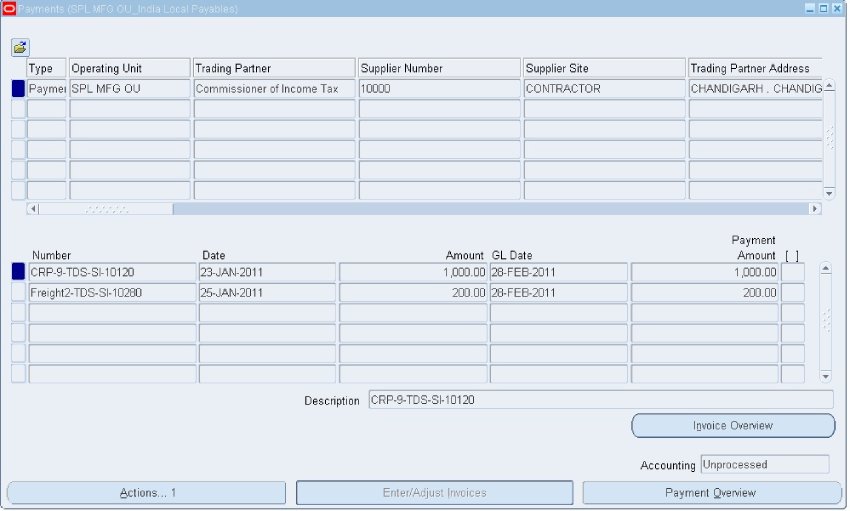
25. We can review the payment created by the payment process in the window of the Standard payment.
26. Choose to create accounting from Actions to generate accounting entries for the payment.